

You’re ready to sell online courses and you’re hopefully using Kajabi to do it. Just one problem: how do you add voice-overs to your slides to make compelling courses?
In this article, we walk you through the process of adding voice-overs to both Google Slides and PowerPoint. Plus we’ll give you two other solutions for getting the job done.
Are slides really necessary?
Slides aren’t essential in many courses. You can turn on your camera and just start teaching. But there are times when slides can take your course to the next level.
Slides allow you to illustrate your topic as you teach. This is especially important when you’re teaching complex information.
Instead of only stating important information, you show it to them as well. That keeps your students focused on your key points.
Slides can also help you engage people with different learning styles. Some people learn best from listening. Others need to see the information to truly grasp it. Slides combined with a voice-over can ensure you engage both learning styles at the same time.
Now let’s look at a few different ways you can add voice-overs to your slides.
{{lean-canvas="/misc/leadgen"}}
How to add voice-over to Google Slides
We love Google Slides because it’s free. But voice-overs are not built into the app. Here’s our step-by-step guide for adding voice-over to Google Slides.
1. Develop your script and slides
Write your script. Then create slides to go with your script. Be sure to mark the copy you want to appear on each slide because Google Slides requires a separate audio file for each slide.
Tip: You can put your script in the “speaker notes” section at the bottom of the screen. However, whatever you type in the notes section will be visible to anyone who views the file once it’s shared.
2. Record your script for each slide
To record your audio, you can use Voice Recorder on a PC or Voice Memos on a Mac. We also recommend Online Voice Recorder.
Hit the red microphone and record your script one slide at a time. You’ll see the audio wave in real-time as you record.

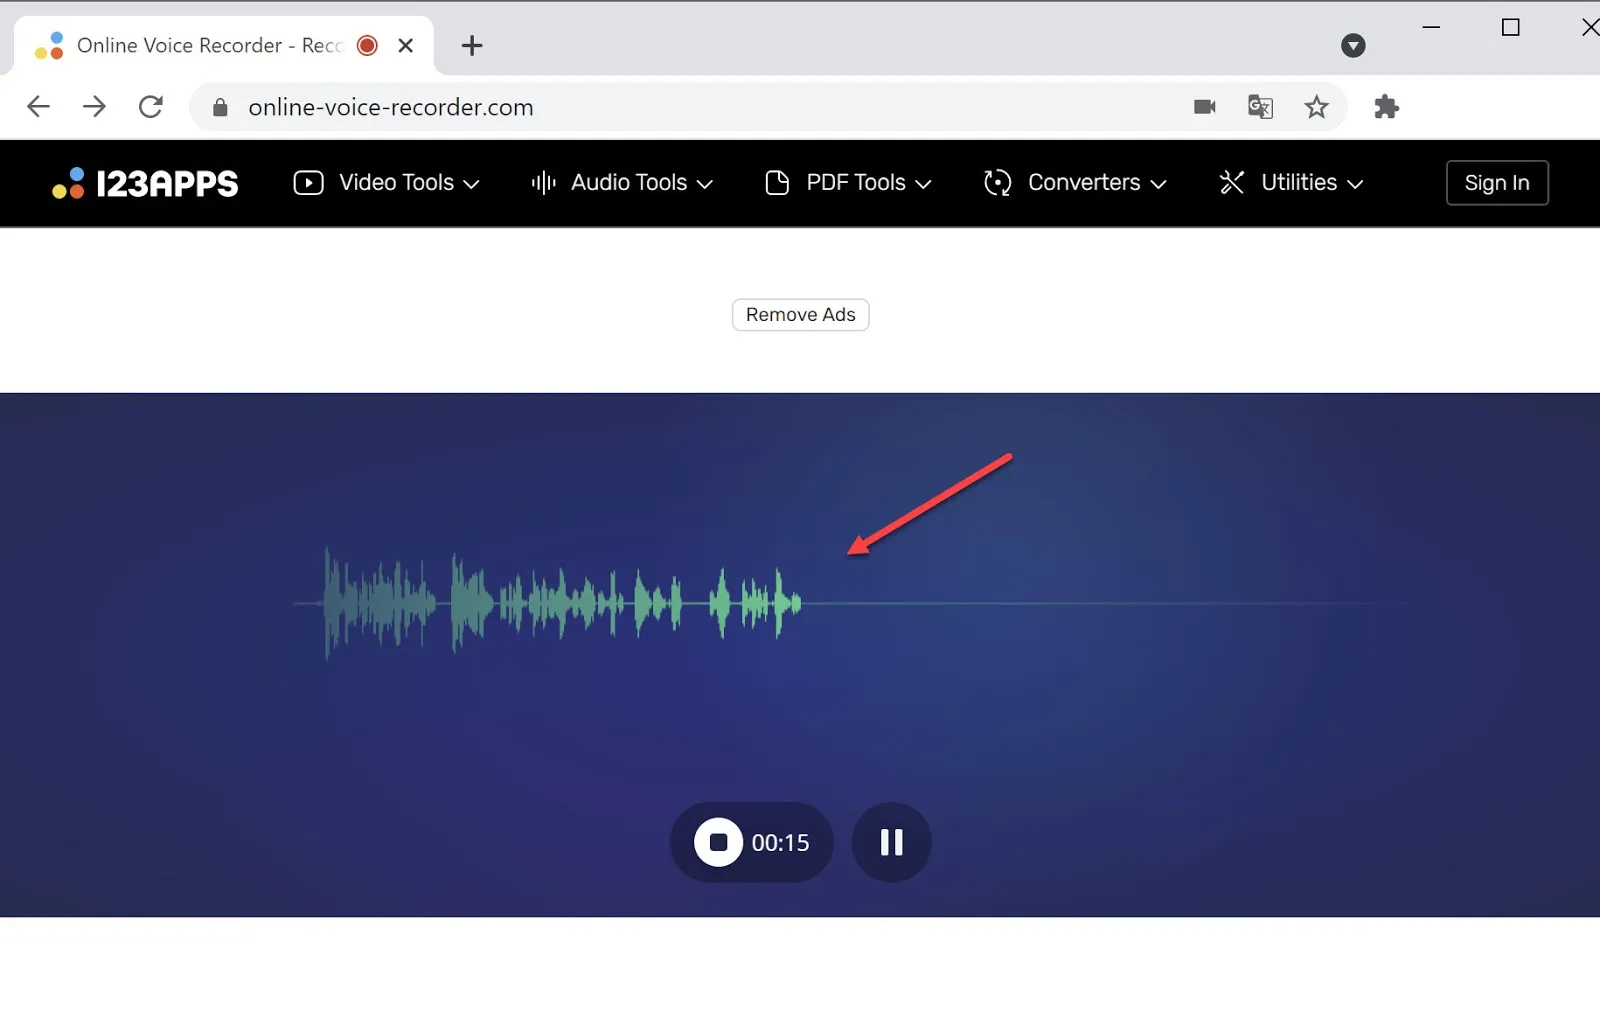
When you’re done, click stop. You’ll be taken to an editing screen. Trim the audio to delete any dead air. Then click the Save button.
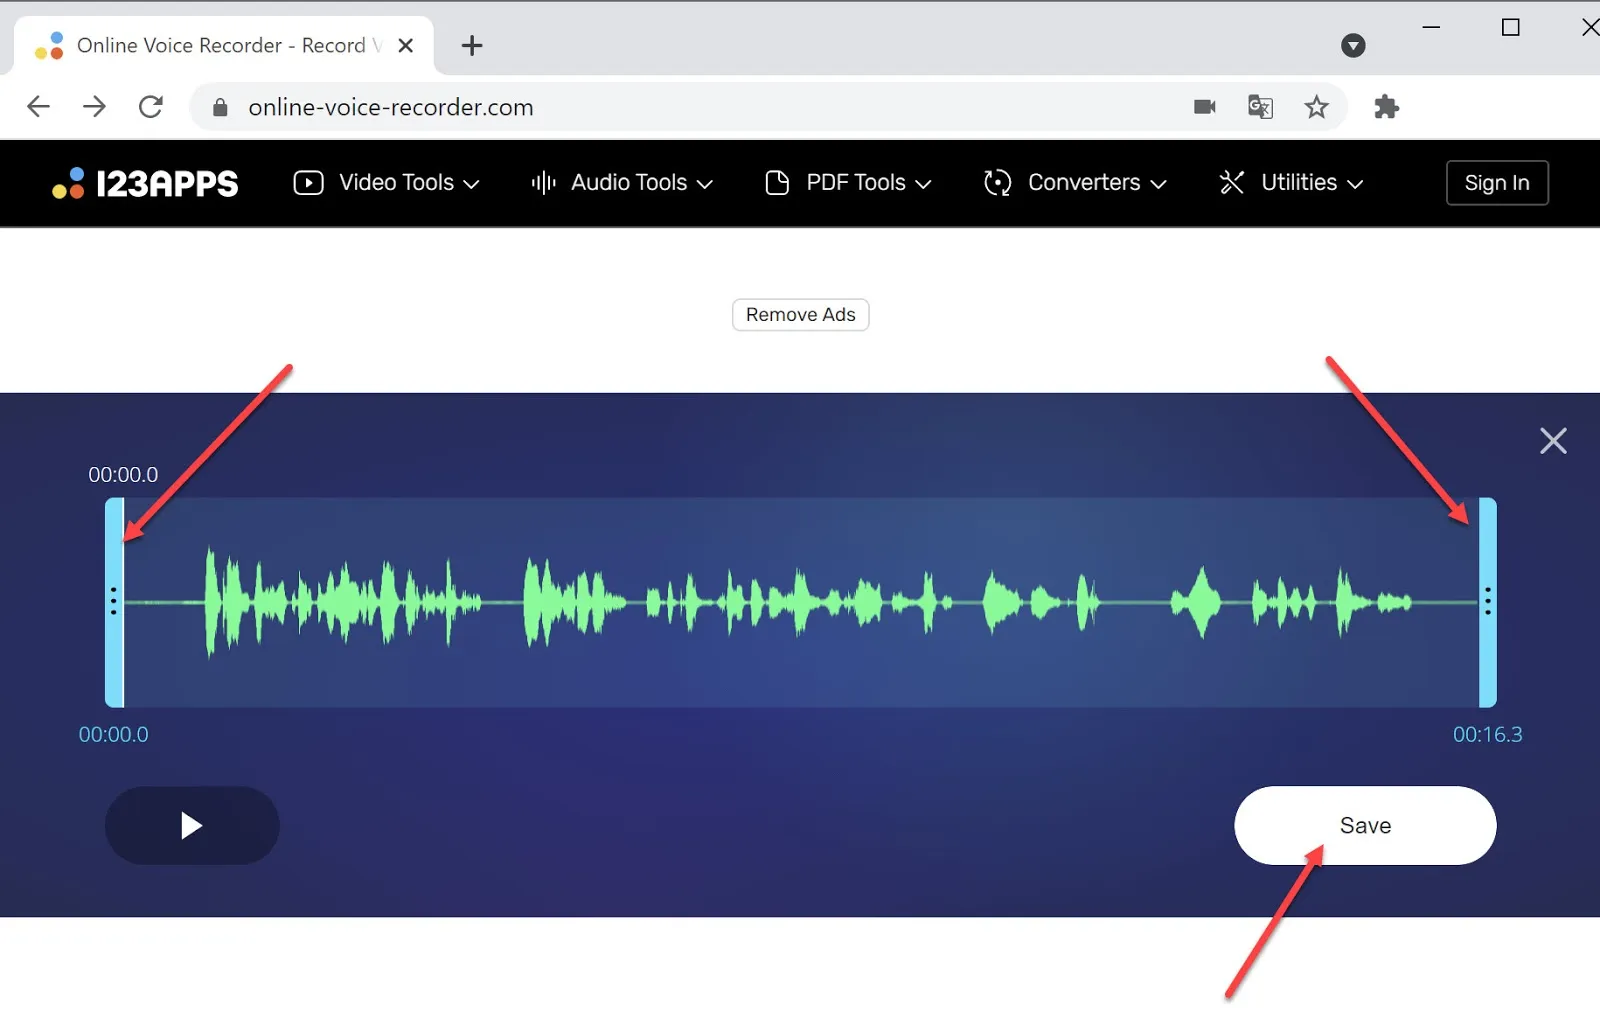
Create a recording for each slide. The saved files will be in your download folder, numbered sequentially.
3. Upload audio files to Google Slides
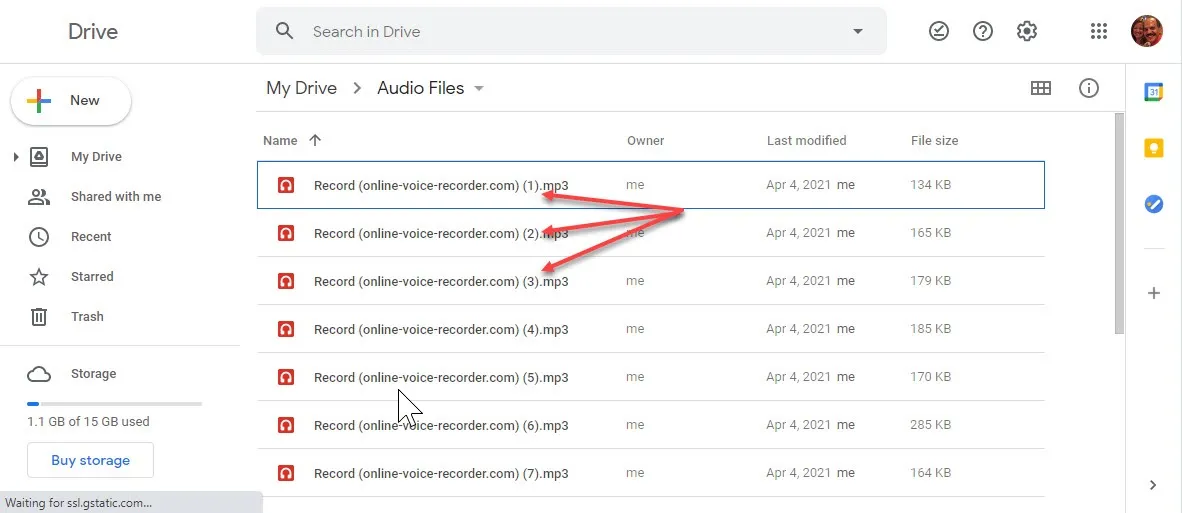
First, create a new folder for your audio clips in Google Drive.
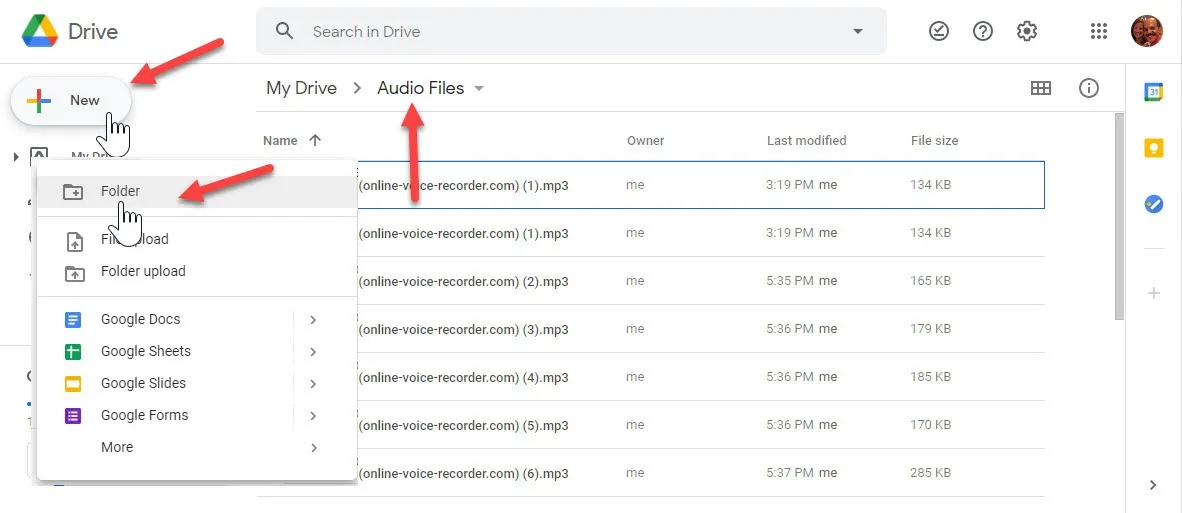
Upload the audio files you just created to this Google folder.
4. Add audio clips to your Google Slides presentation
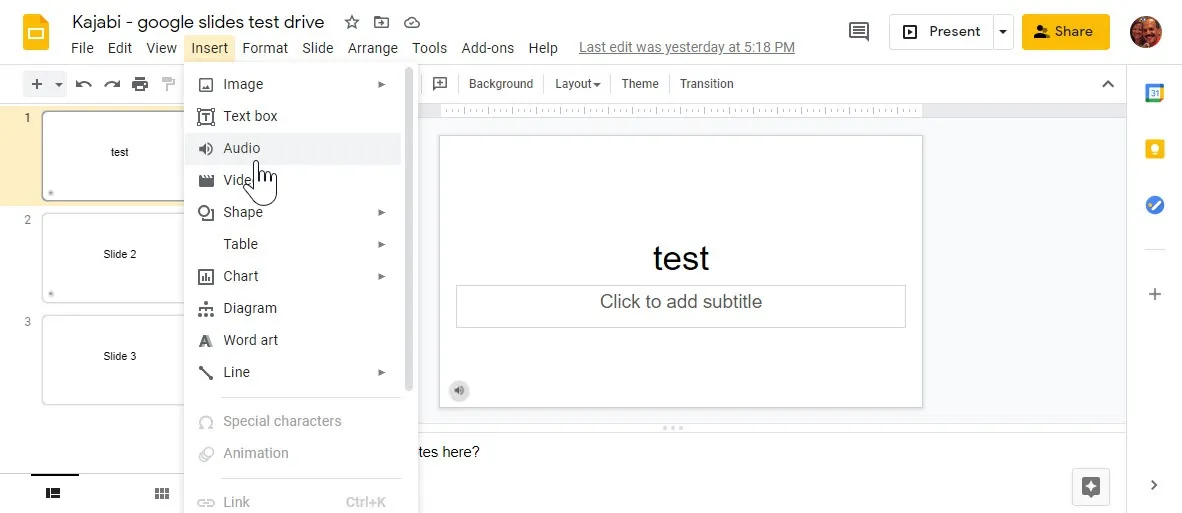
In Google Slides, open the slide that you want to add audio. Click Insert > Audio. Select the audio file that goes with that slide.
When you insert the audio clip, two things will happen:
- An icon of a speaker will appear on your slide with a mini-player so you can preview the audio. You can move that icon to any place on the screen.
- A format options tab will open.
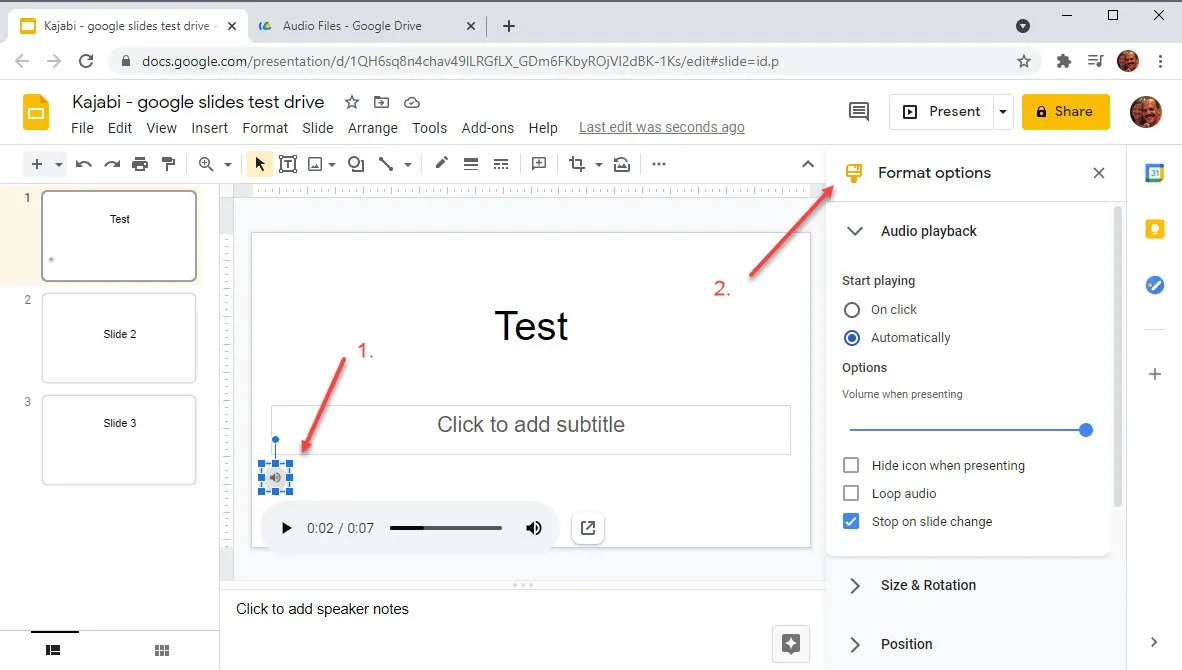
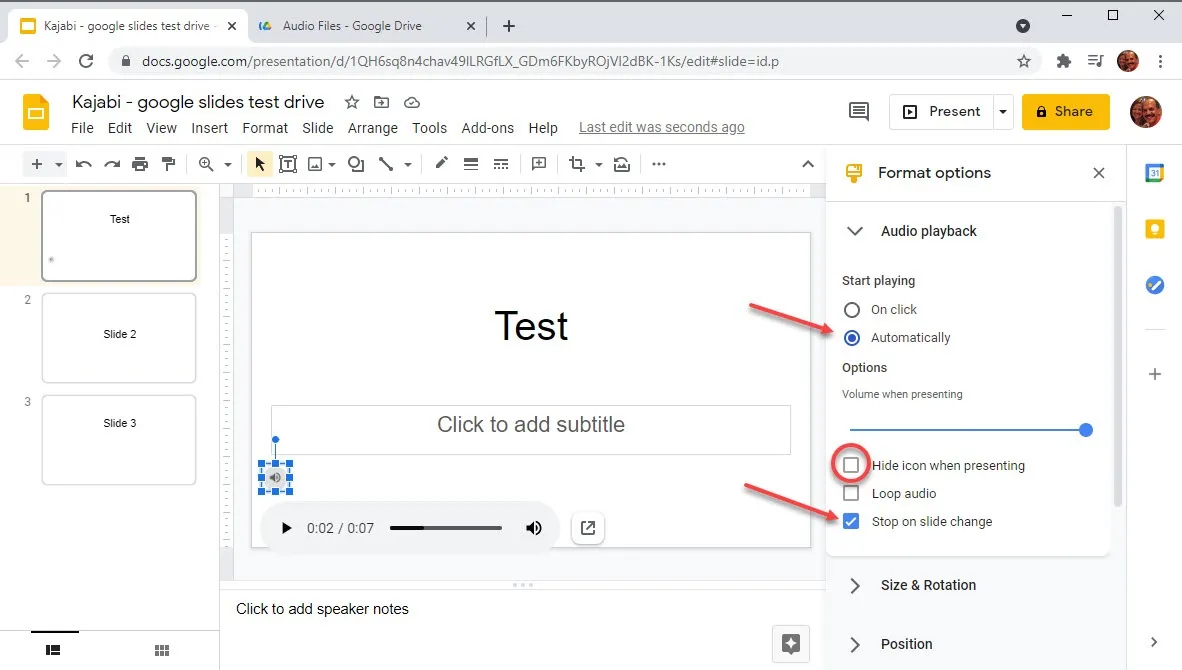
For online courses, choose to have the clip start automatically. This allows your students to click through the presentation without having to click the audio icon manually.
Select, “Stop on slide change.” Otherwise, the audio will continue playing over the next slide.
Note: You can hide the speaker icon if you don’t want it to appear on the screen when you’re presenting.
Repeat these steps for every slide. Test your presentation in Present mode to make sure everything is working properly.
To add your video to Kajabi, get a shareable link by clicking the share button in the upper right-hand corner. Copy the link and insert it into the body of your lesson in your Kajabi course.

How to add voice-over to PowerPoint (online version)
PowerPoint’s free, online version works much like Google Slides.
1. Record your script
Record your script as individual audio slides, just as you would for Google Slides.
{{lean-canvas="/misc/leadgen"}}
2. Insert your audio clips on each slide
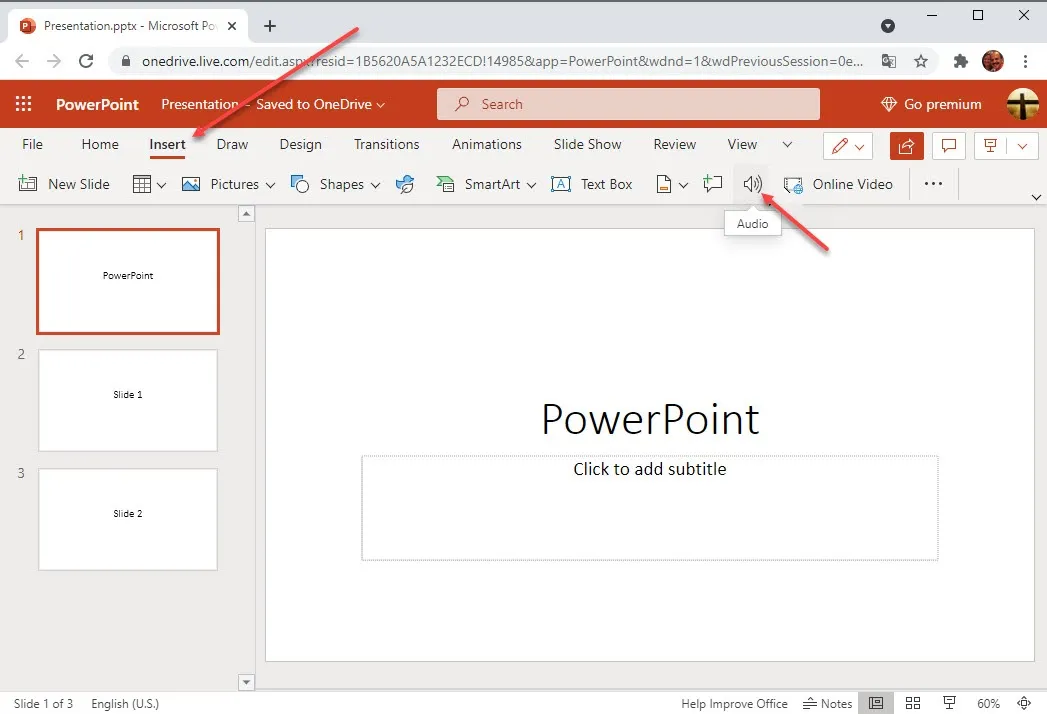
In PowerPoint, select Insert > Audio to insert your audio files.
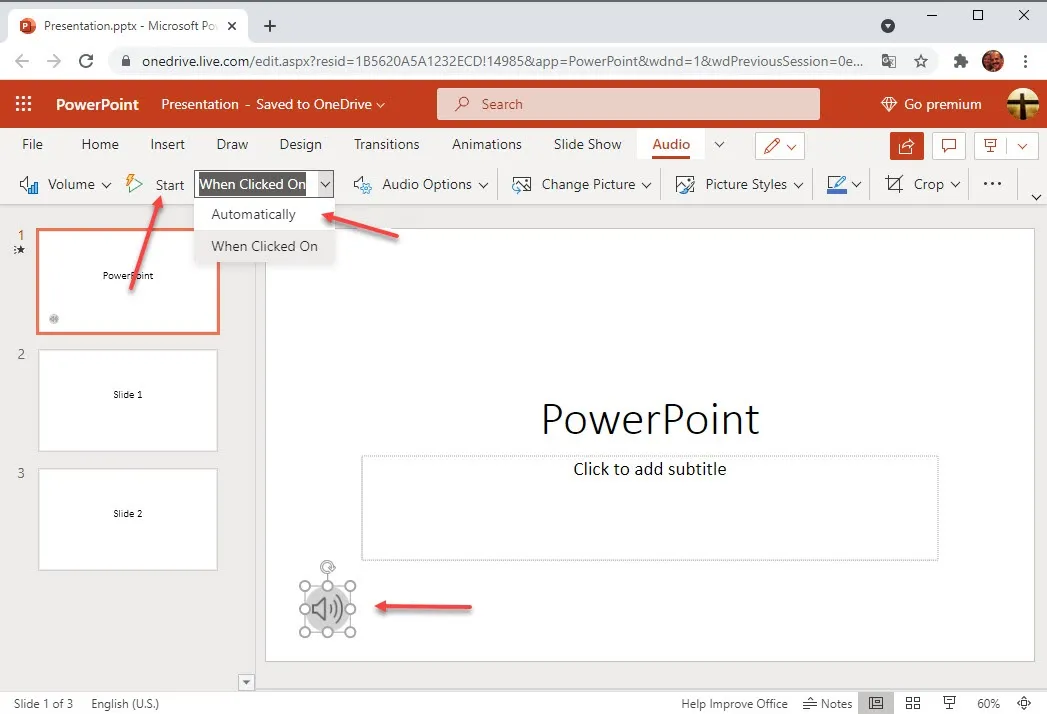
3. Format the audio
Select Start, then choose Automatically to make the presentation start the audio as soon as your student advances to the next slide. Move the speaker icon wherever you’d like it to appear.
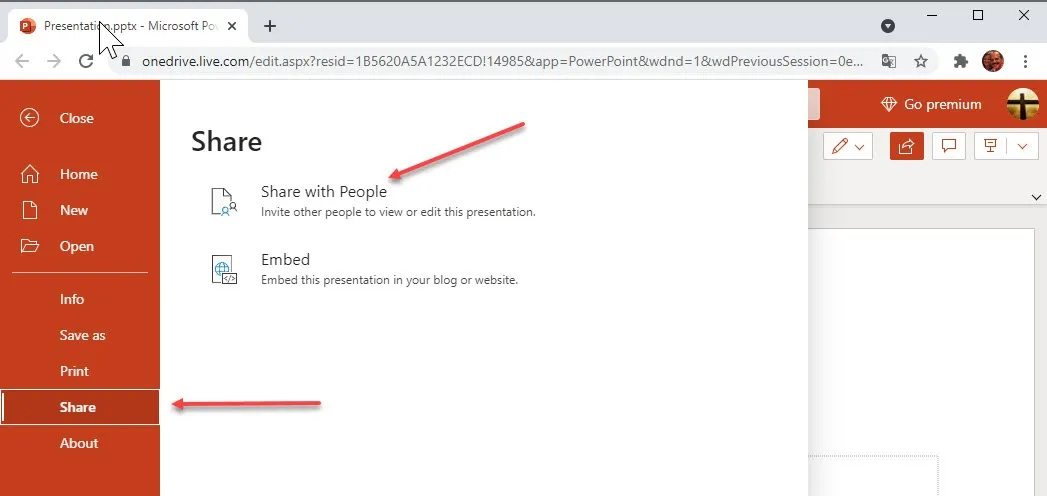
4. Share your presentation
Choose File > Share > Share with People to get a link. Paste the link in your Kajabi course and you’re done.
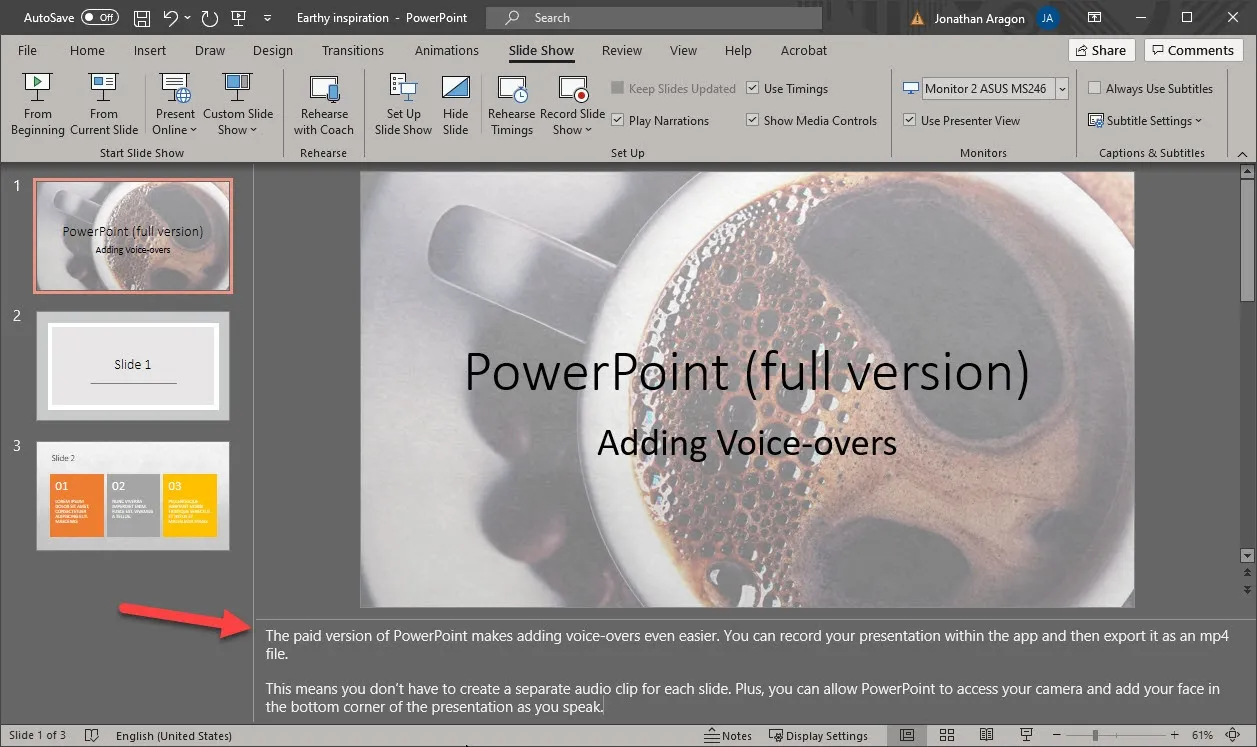
How to add voice-over to PowerPoint (full version)
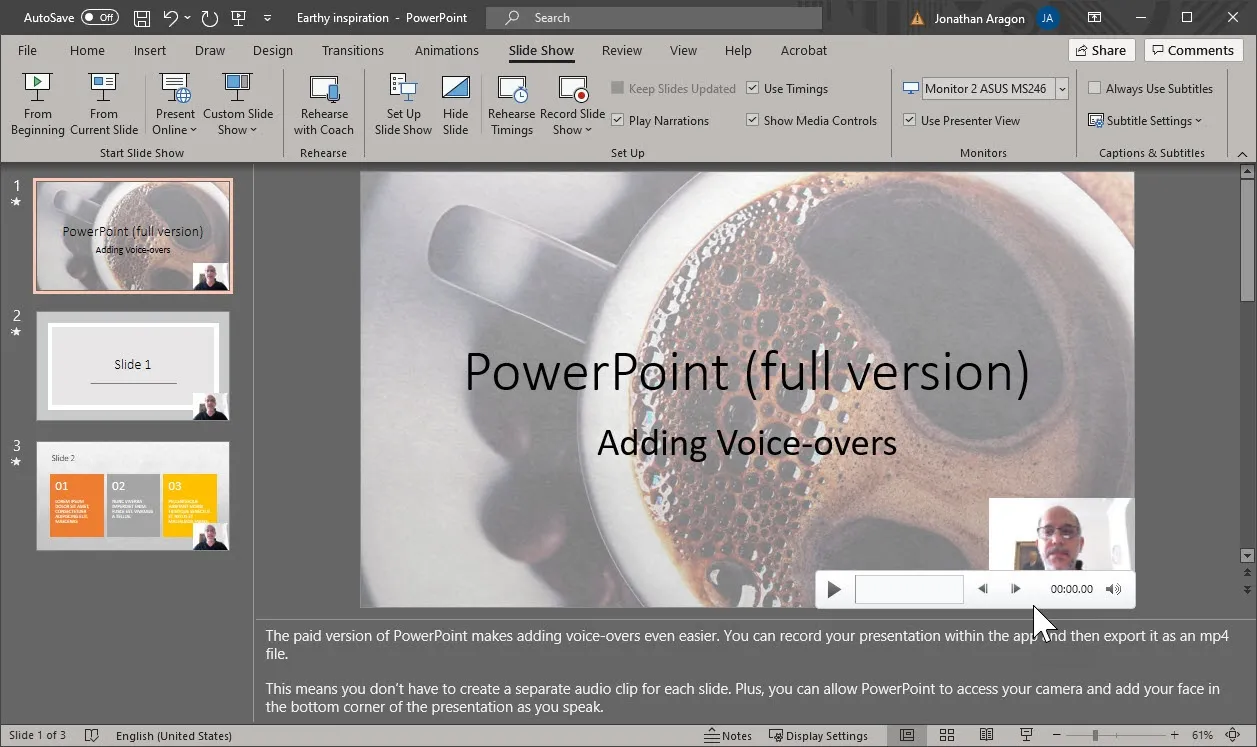
The paid version of PowerPoint makes it even easier to add voice-overs to your slides. You can record your presentation directly within the app, then export the file as an mp4.
This means you don’t have to create a separate audio clip for each slide. Plus, PowerPoint can access your camera and add your video to the bottom corner of the screen.
Here’s a step-by-step guide for adding voice-overs in PowerPoint:
- Build your script
Type your script directly into the notes section of your presentation. When you record your audio, the script will appear at the top of the screen, serving as a teleprompter.
With the full version of PowerPoint, your audience won’t see your notes. You’ll record a presentation rather than just sharing access to your slide deck.
- Record your presentation
When you’re ready to record, click Slide Show > Record Slide Show.
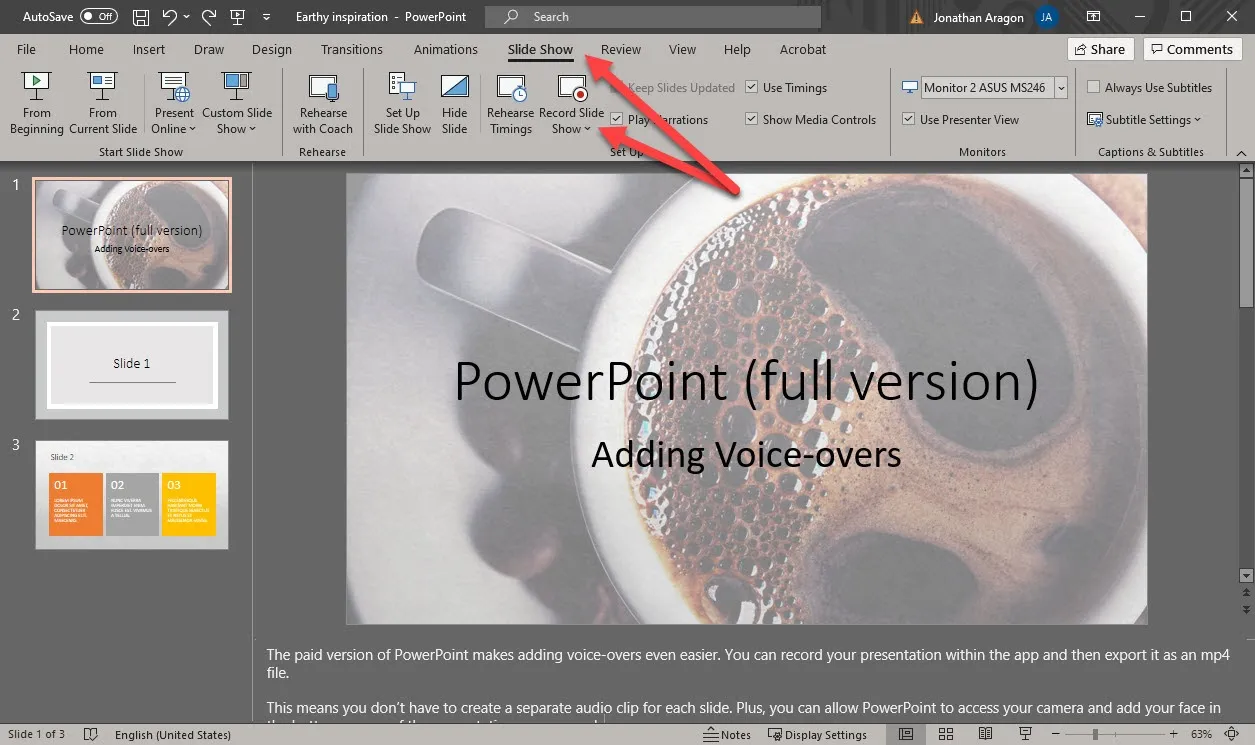
The recording screen will open, and you’ll see several key menu areas.
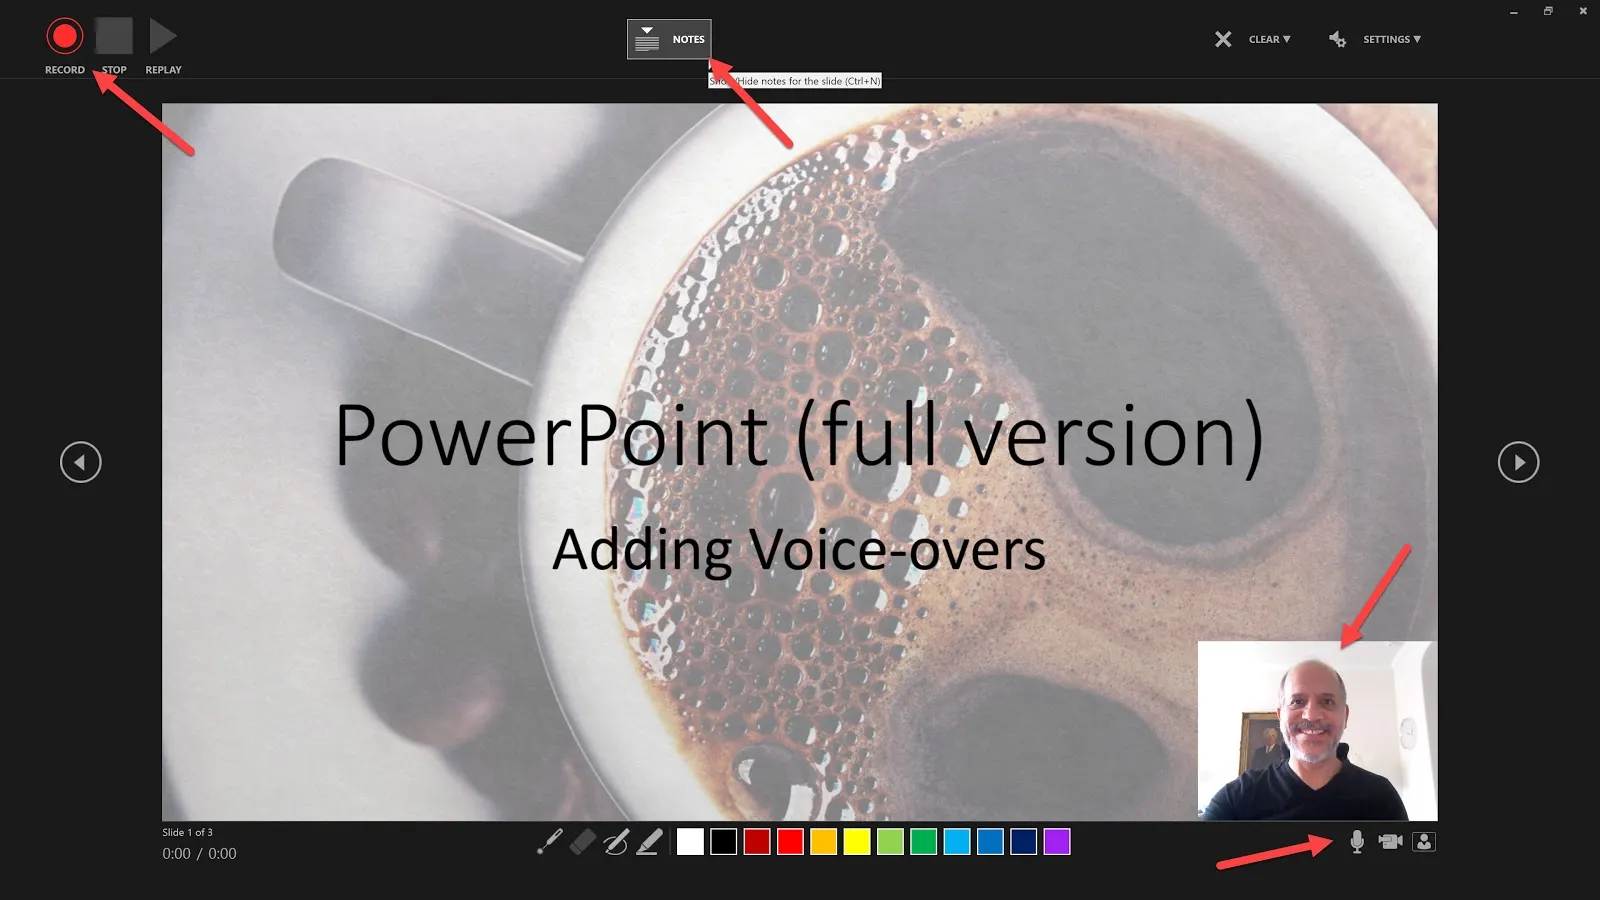
In the bottom, right corner you can hide the camera preview and toggle your microphone and camera on or off.
To turn on your camera and mic, click Record in the top, left corner. To use your slide notes as a teleprompter, click Notes at the top, center of the screen. PowerPoint will display your script for each slide right under your camera.

When you click Record, go through the entire presentation, just as you would if you were teaching live. When you’re ready to move to the next slide, click the arrow to advance and continue presenting.
There’s no need to stop recording between each slide. But if you want to stop or correct a slide, you can start the recording process from that slide.
Select Record Slide Show / From Current Slide. PowerPoint will pick up where you left off. Or you can just re-record that one slide.
When finished, click Stop and close the Record Screen. PowerPoint automatically updates your presentation with your narration.
Tip: Before you advance to the next slide during recording, make sure you’re done reading the script for that slide. Wait just a second before beginning the narration for the next slide. PowerPoint clips the audio between slides. You can’t narrate through a slide change.
- Export your presentation
Once you’re back inside the edit screen, you can preview the recording for each slide. Hover over your camera image, and a mini-player will appear. Click on the Play button to preview that slide’s recording.
When you’re satisfied with your presentation, select File > Export > Create a Video. Choose your output quality and the destination for your file. Then you’re set.

This presentation is an mp4 file. You can import it to your Kajabi course as you would any other video.

{{lean-canvas="/misc/leadgen"}}
How to add voice-over with third-party apps
Screen Capture
Screen capture apps like Loom allow you to capture whatever is playing on your screen and share that link as you would with Google Slides.
Present as you would in a live setting and Loom will capture your screen and your audio. It will also add your video to the recording if you like.

Loom has several presentation features you might like. The paid version is available for as low as $8/month. The free version is limited to five-minute recordings.
Video Editing Software
The advantage of a video editor is that you can do more than just capture your slides. You can add video clips, images, and audio files from a variety of sources. Filmora and Camtasia are good options for this.
To use Filmora, export your slides as images and import them into your Filmora project.
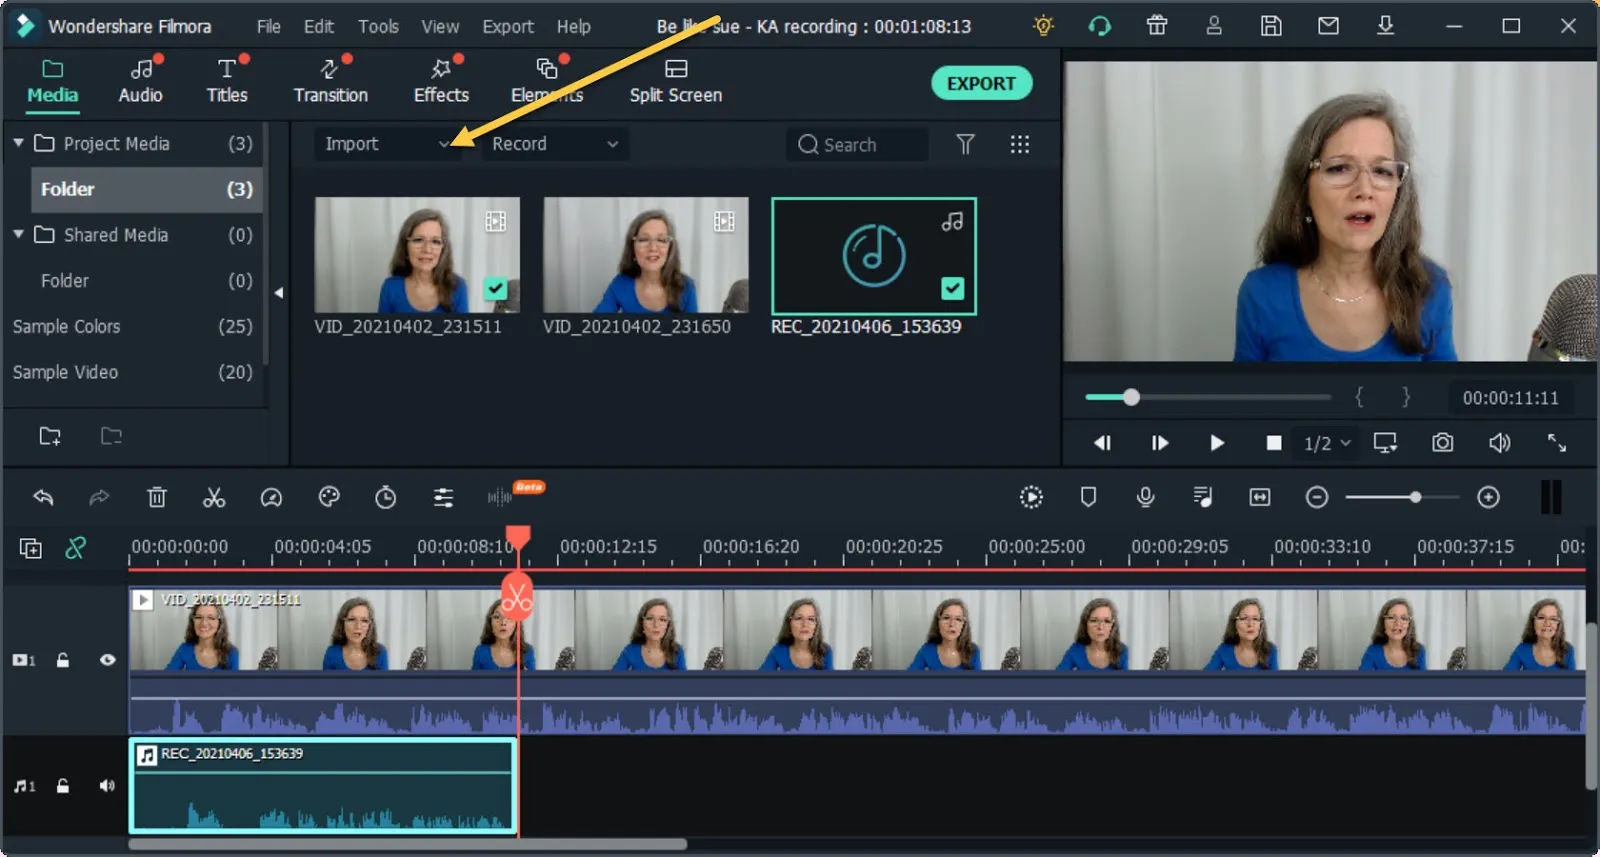
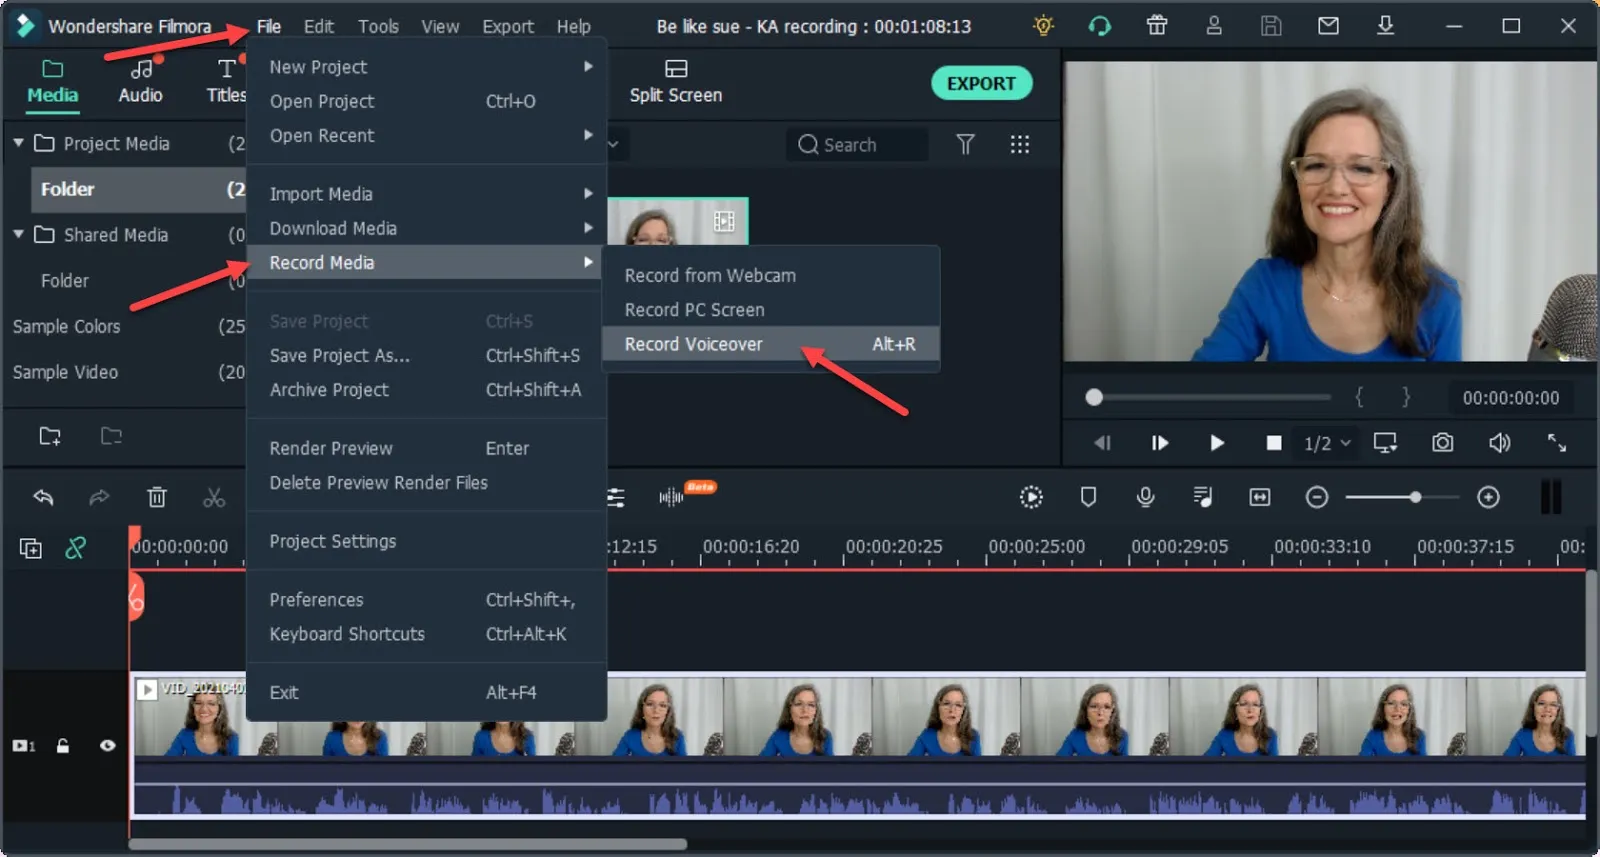
Record your script directly into the editor.
Drag each slide image into the timeline to match the narration. Since your audio is not tied to any particular slide, it can flow seamlessly under your entire presentation. You can also edit mistakes in the audio and rearrange the slides if needed.
{{lean-canvas="/misc/leadgen"}}
Back to you
Kajabi makes it easy to add learning assets to your course. Knowing how to create Google Slides or PowerPoint presentations means your students will receive the best content possible. And with voice-overs, you’ll be able to keep them engaged through the entire course.